See what it does.
Real screenshots from the console: the core flow first, then the things most AI app builders don't do. Demo videos go next to each part as they're finished. Up so far: registering an iPhone, Co-vibe, your own server, your own Apple account and connecting GitHub.
Click any screenshot to see it full size.
From an idea to an app on your phone.
You describe it. The AI designs it, writes the code, builds it and hands you something to install. It all happens in one chat.
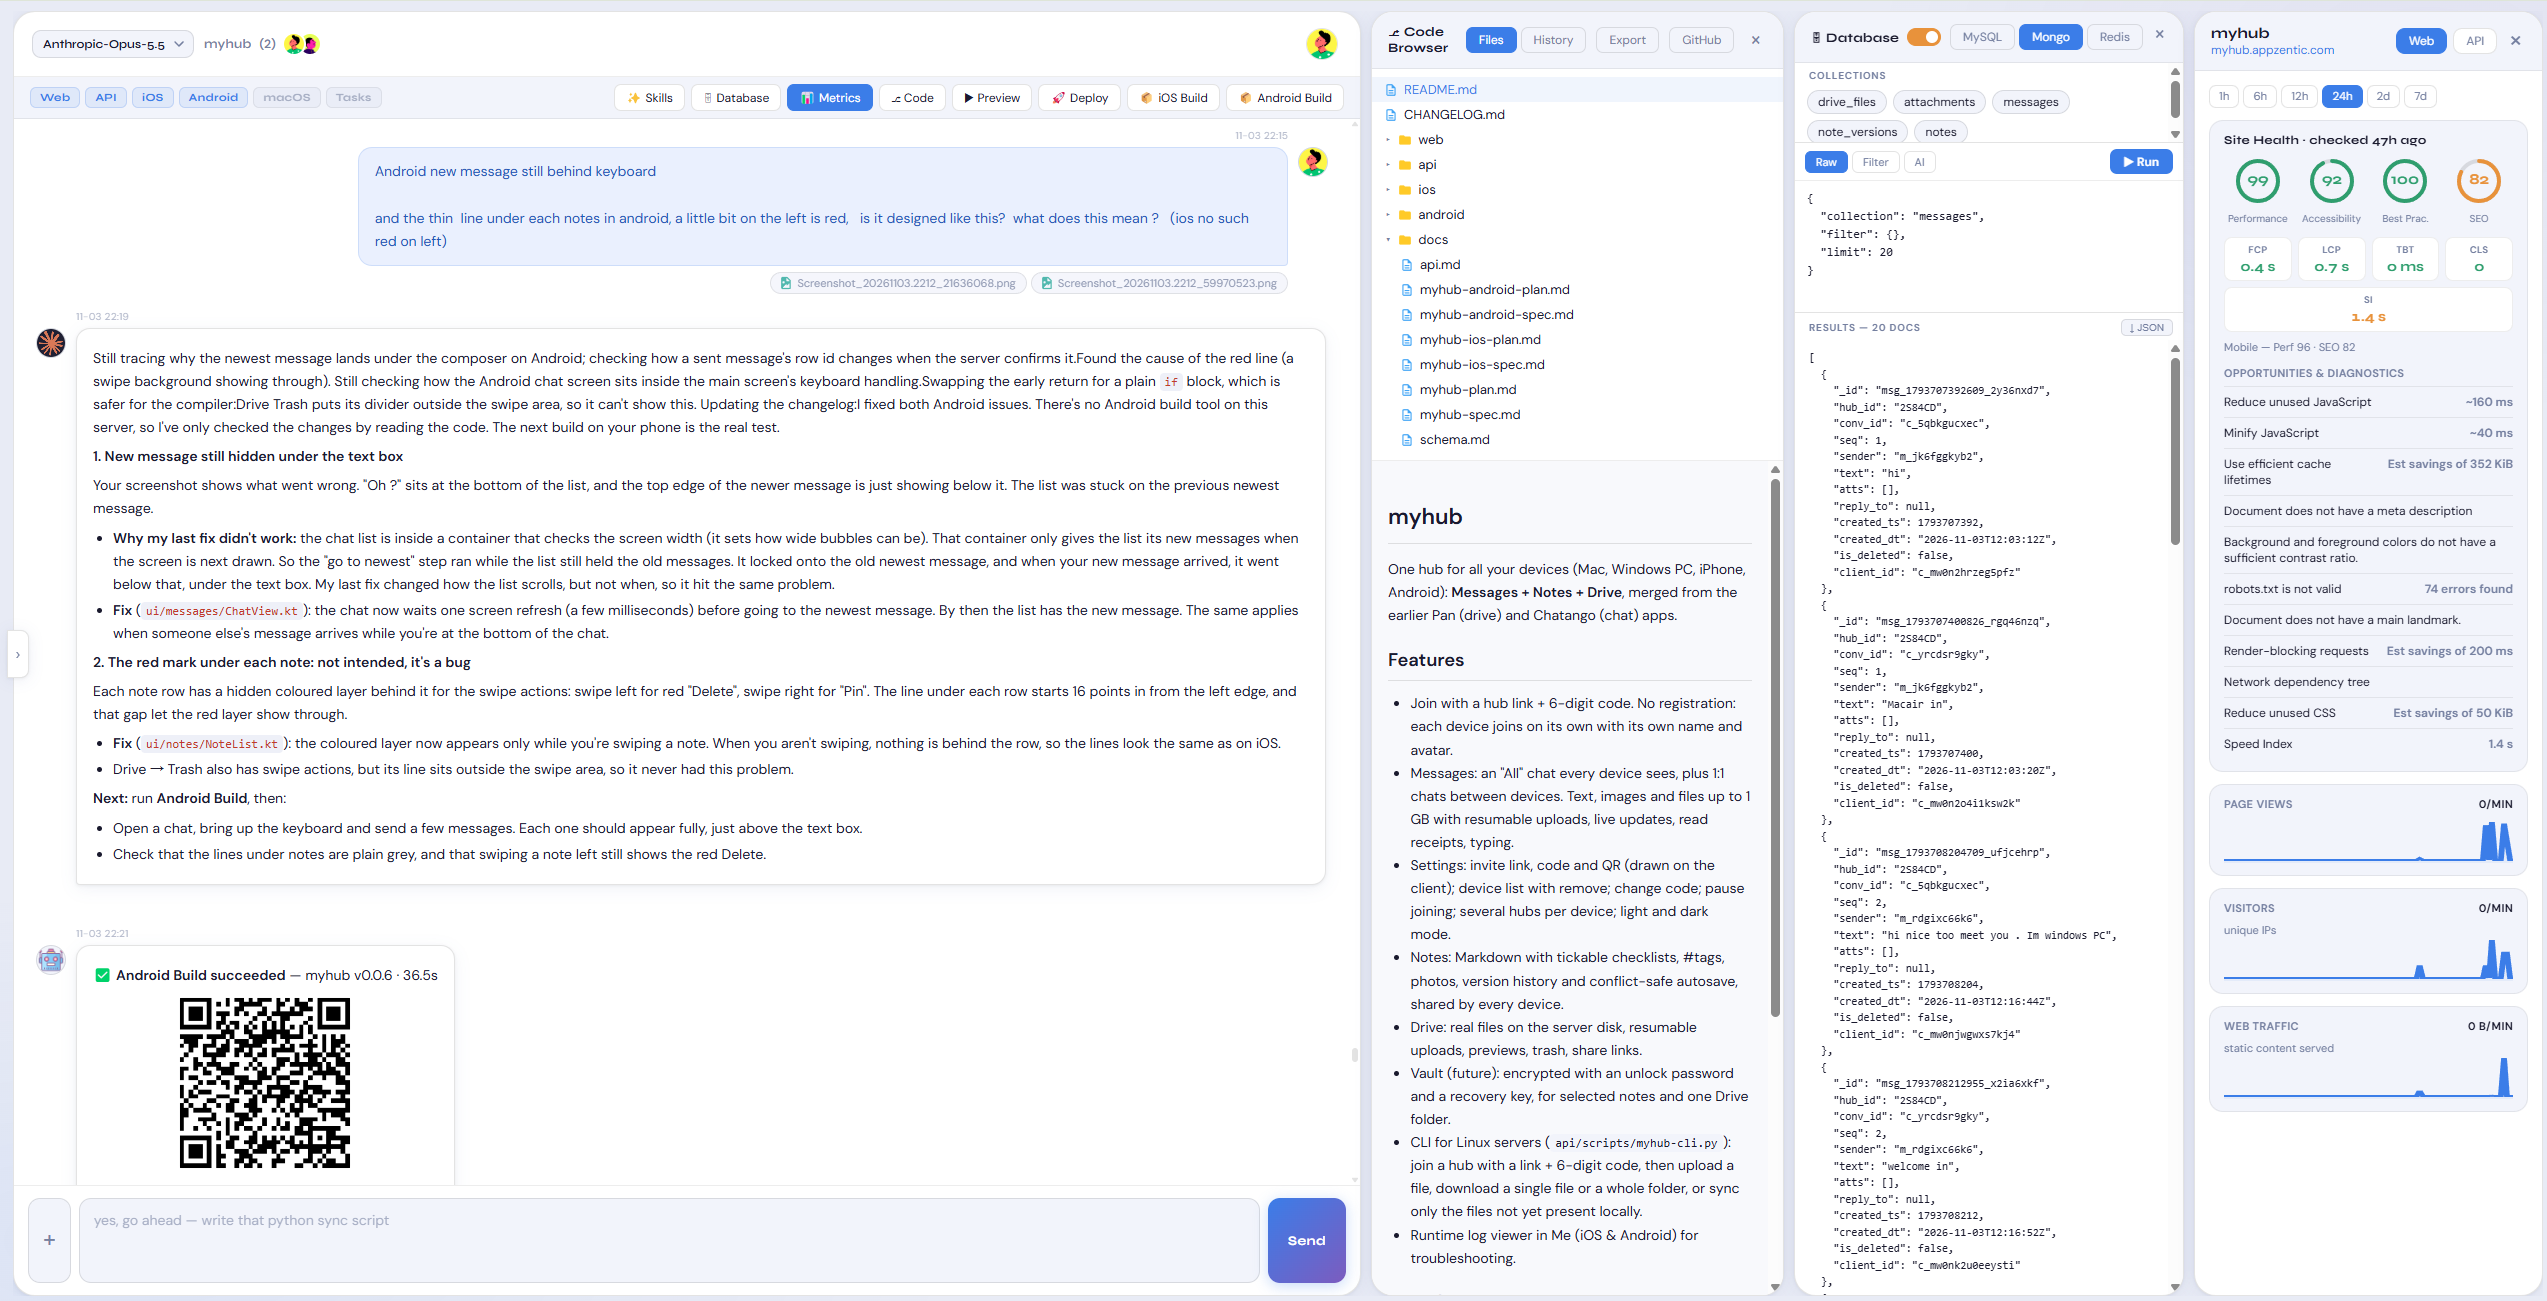
Say what you want
Plain words are enough. Before writing any code, the AI proposes a design (what goes in, which platforms, what it won't do) and asks about the decisions that are hard to change later.
- Native iPhone (SwiftUI) and Android (Kotlin) apps, plus web, macOS and the backend behind them
- One chat per app, with the whole history kept
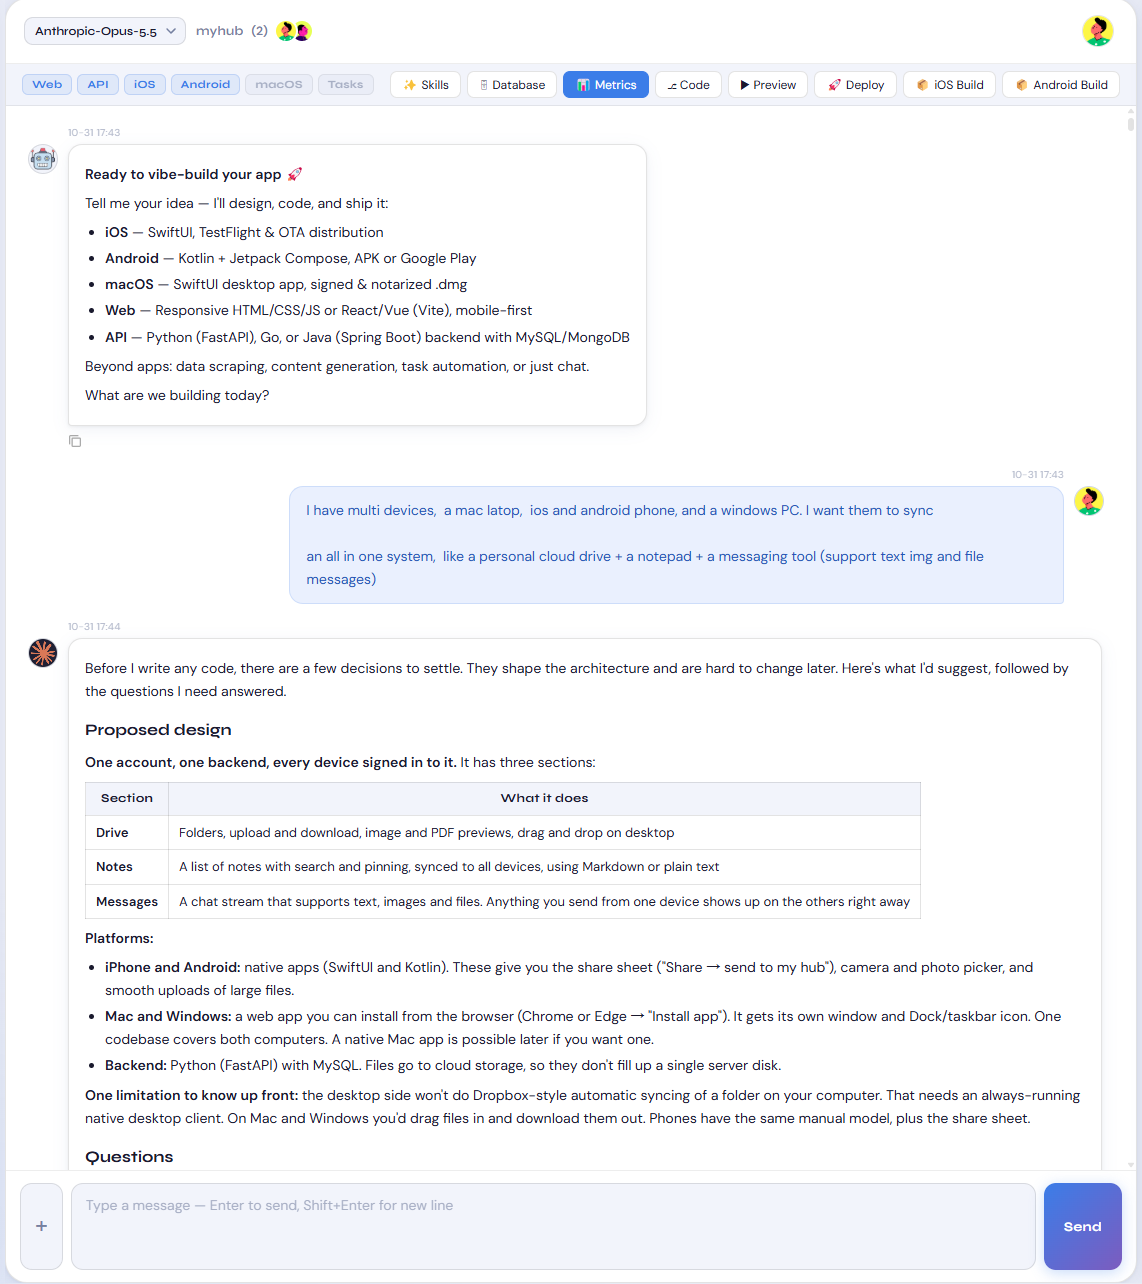
Build for iPhone and Android
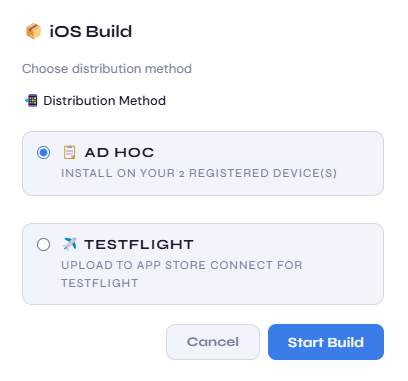
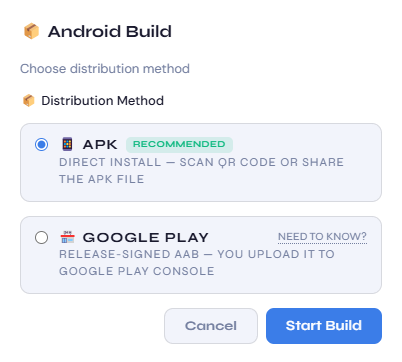
Two buttons at the top of the chat. Choose how each one ships:
- iPhone: Ad Hoc installs on your registered devices. TestFlight uploads to App Store Connect (needs your own Apple account).
- Android: an APK you install straight away, or a release-signed AAB that you upload to Google Play Console.
Register your iPhone once
Apple only lets test builds install on devices it knows about. In My Profile → iOS, scan the QR code with your iPhone and the device is added. You do this once per phone. Android doesn't need this step.
▶ Watch it: one minute, computer and iPhone side by side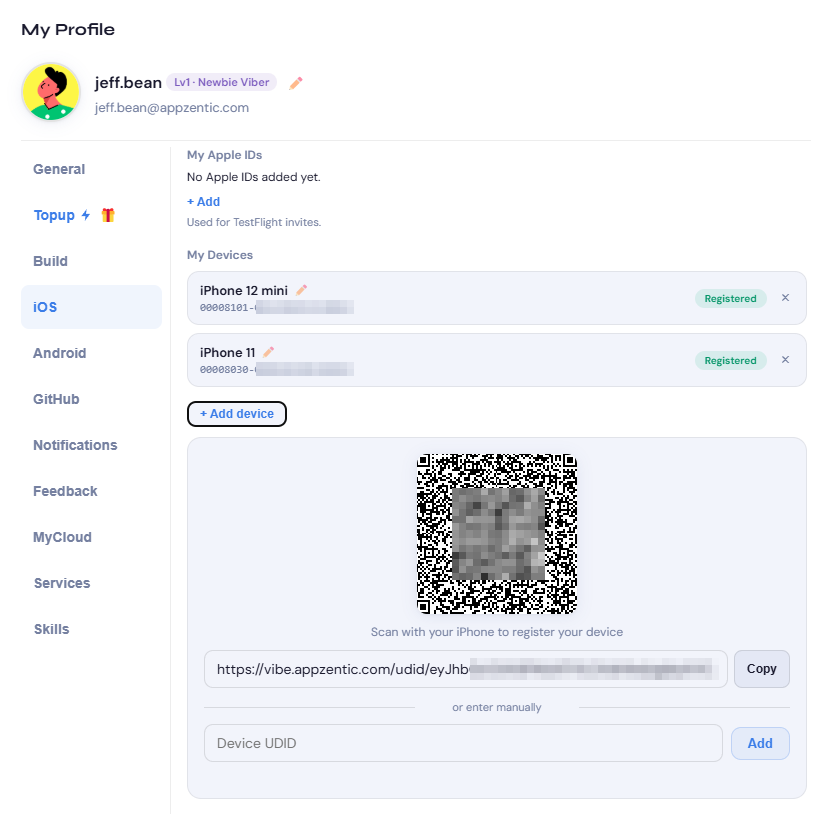
The step people miss: finish it in Settings
Tapping Allow only downloads the profile. iOS doesn't install it until you confirm in Settings:
- Open Settings. A new row, Profile Downloaded, appears near the top, just under your name. It's easy to miss.
- Tap it, then Install, enter your passcode, and tap Install once more.
- Go back to Safari. The page now says your UDID has been collected, and the console lists the iPhone.
No such row? Look in Settings → General → VPN & Device Management. iOS discards a downloaded profile that isn't installed within about 8 minutes. If that happens, scan the code again.
Why we need your UDID, and what it can't do
- It's Apple's rule. An app installed outside the App Store only runs on iPhones whose UDID (Unique Device Identifier) is listed in the Apple developer account that signed it. Every iOS developer registers test phones this way.
- What we keep: the UDID and the model, such as iPhone 11. The model only names the device, so you can tell your phones apart once you've registered a few; rename it anytime with the pencil in My Profile → iOS. No name, phone number, Apple ID, contacts, photos, messages or location.
- Where it goes: into the Apple developer account that signs your builds, ours by default or your own. We don't use it for ads or tracking, and we don't sell it.
- It isn't device management. The profile can't see, track or control anything on your phone. All it leaves is a Home Screen icon (ApzUdid) that shows your registration status.
- Remove it anytime: delete the icon, or remove the profile in Settings → General → VPN & Device Management. Your iPhone stays registered, so your builds still install.
More in our Privacy Policy.
Scan it, and it's on your phone
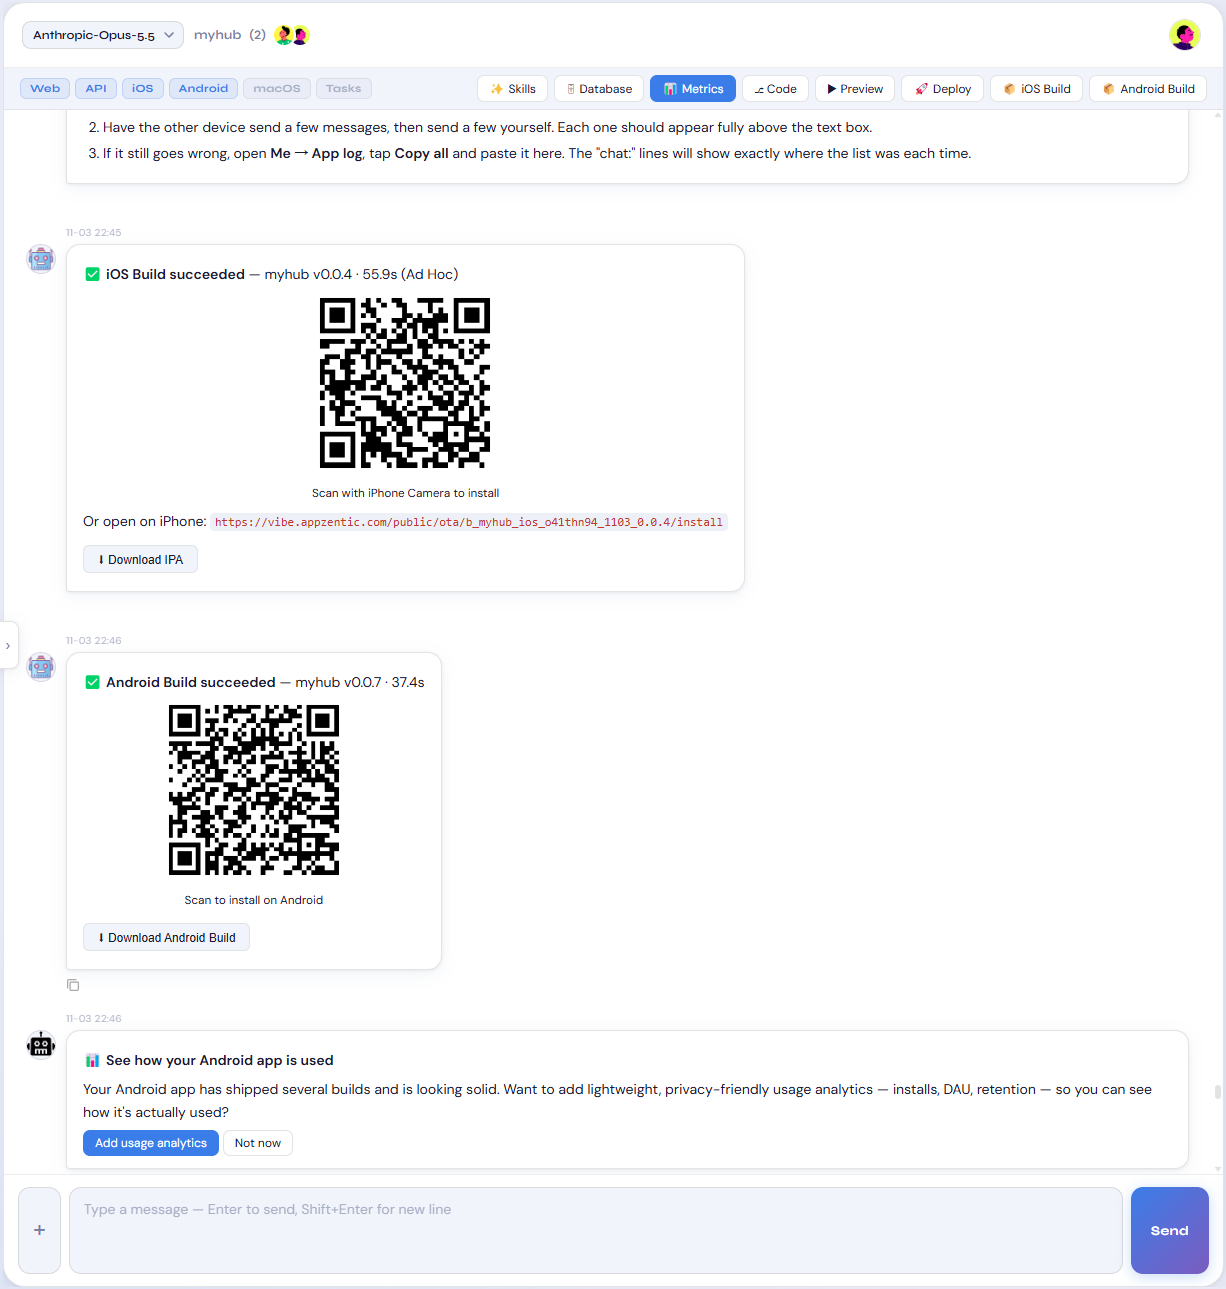
When a build finishes, it shows up in the chat as a QR code. Point the phone's camera at it and the app installs. The cards show how long the build took: under a minute for both of these.
- Prefer the file? Download the IPA or APK from the same card
- Not working the way you hoped? Say so in the chat, and the next build is a scan away
Bring your boss, your PM or your testers into the chat.
Invite anyone into an app's chat by email or phone number and give them a title. They work with the AI right there, just like you: chat, upload screenshots, preview, build and deploy. No more screenshots for a status meeting. They watch the app come together.
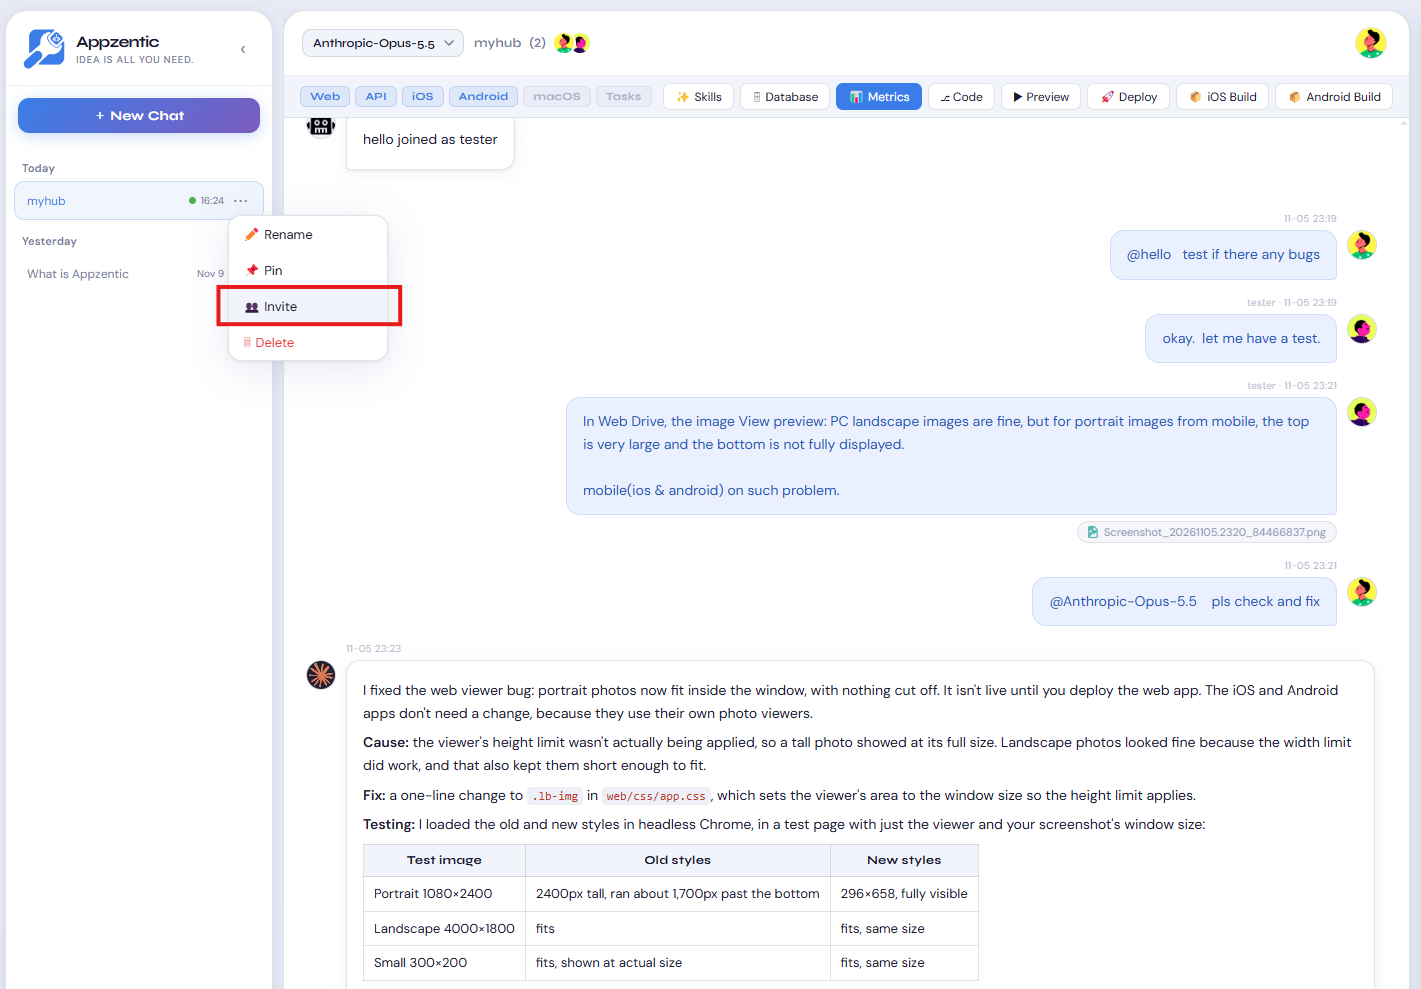
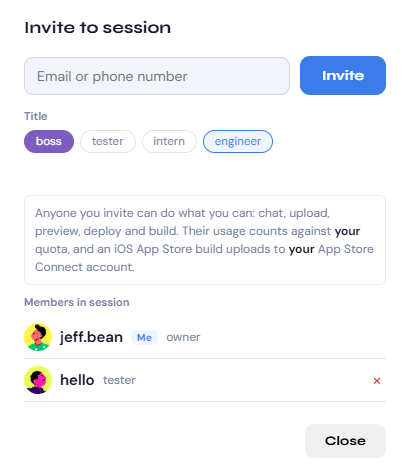
Invite from the chat's menu
Enter an email or phone number and pick a title: boss, tester, intern or engineer. Everyone in the chat can @mention each other or the AI, so a tester can report a bug and the fix lands in the same thread.
- Their usage comes out of your balance. You pay once for the team, not per seat
- Renaming, deleting, inviting, GitHub and export stay with you as the owner. More in the Docs →
Deploy to a server you own.
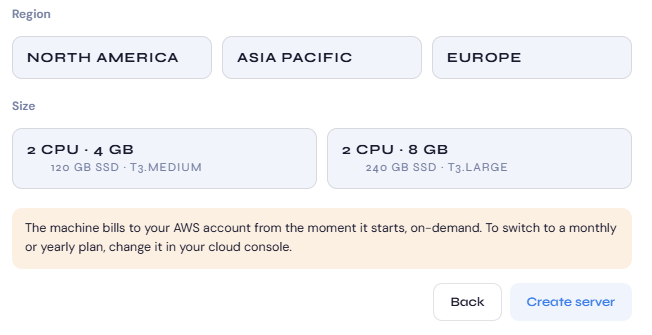
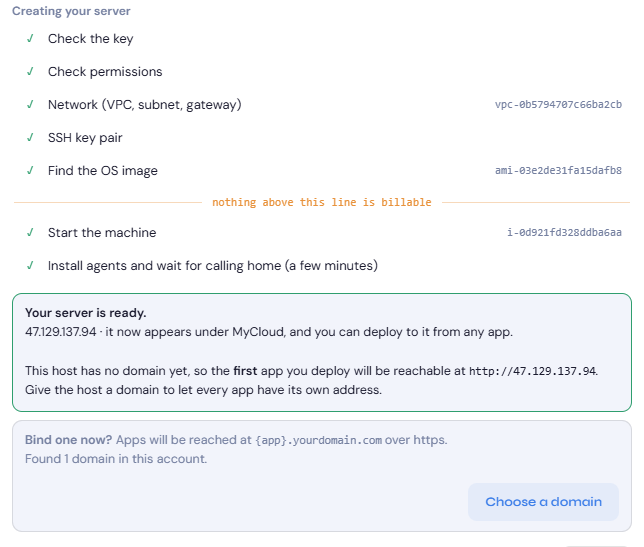
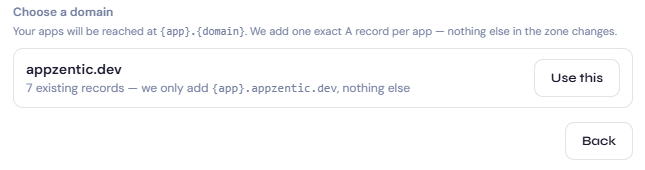
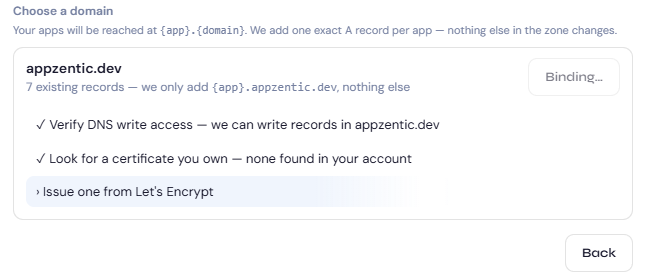
Your apps can run on our shared hosting or on a machine in your own cloud account. Give us an AWS or Alibaba Cloud key and we open the server in your account, set it up, and give it your domain and an HTTPS certificate. Already have a server? Attach it with one command.
▶ Watch it: from an AWS key to a deployed app, 5 minutesThe machine and the bill are yours
- Your cloud provider bills you for it directly. We don't charge hosting for apps running on your own server
- Every app gets
{app}.yourdomain.comwith a Let's Encrypt certificate that renews automatically - Download the SSH key and log in yourself whenever you like
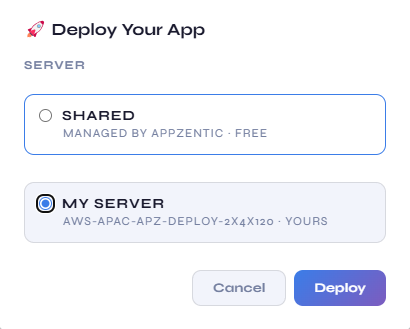
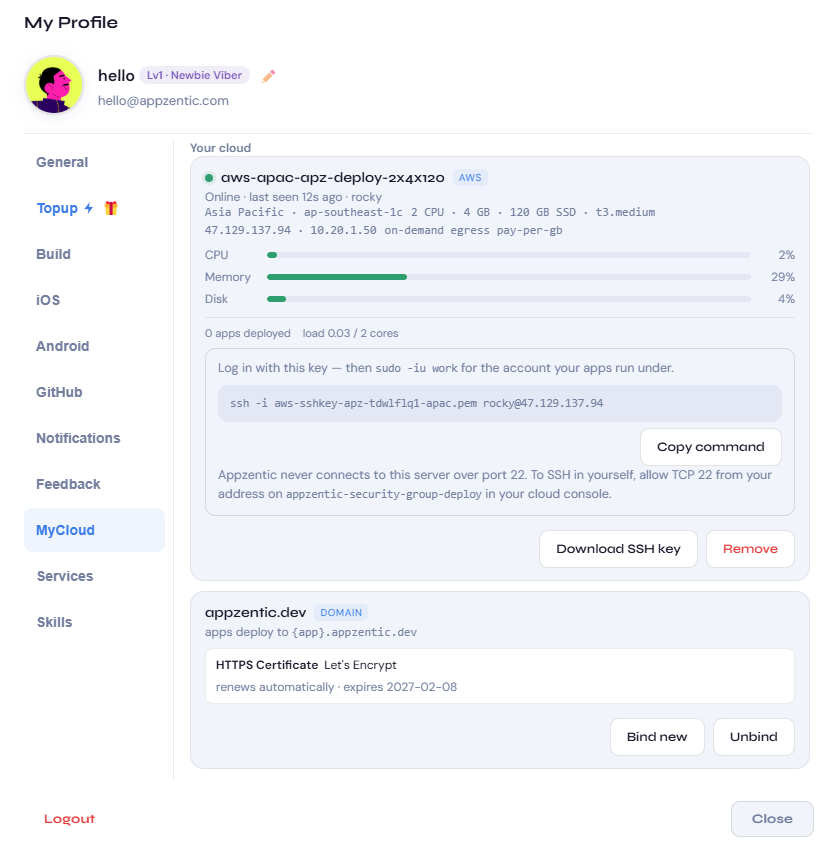
How it gets set up
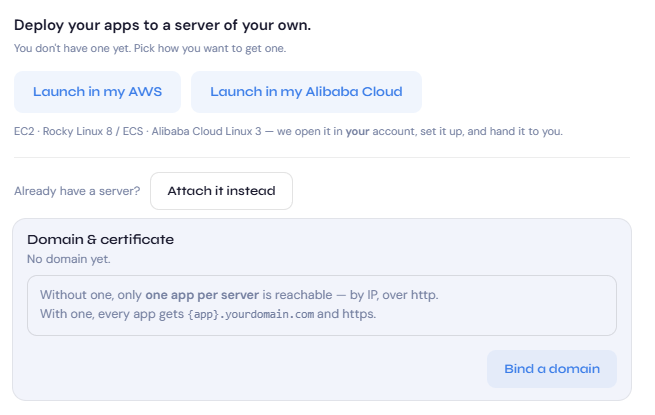
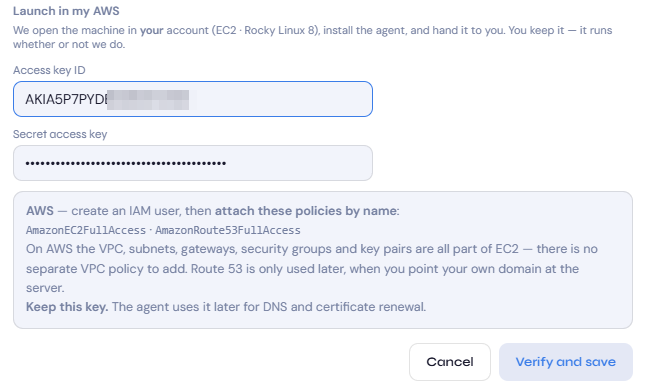
Credentials, costs and what happens if you leave: in the Docs →
Ship iOS apps under your own Apple developer account.
Add your App Store Connect API key once. From then on, apps use your bundle prefix (com.yourcompany.app), are signed by your team, and iOS builds can go straight to your TestFlight, with no Xcode and no upload tool.
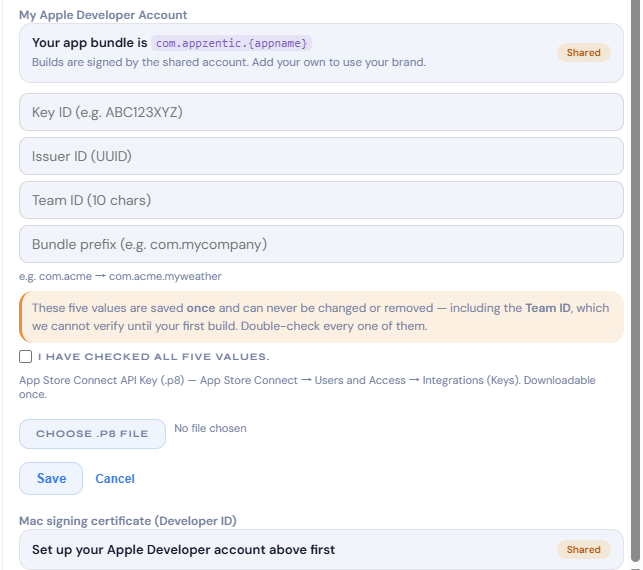
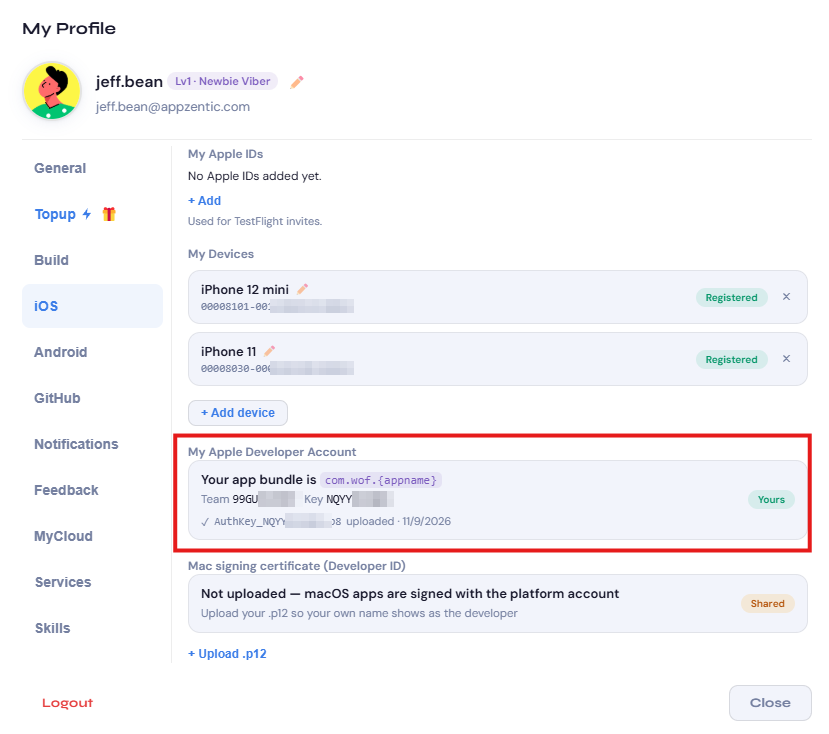
- No Apple account yet? Builds use our shared one, which is fine for testing on your registered iPhones.
- Building for Mac too? Upload your Developer ID certificate and macOS apps carry your name as well. More in the Docs →
Your code, in your GitHub.
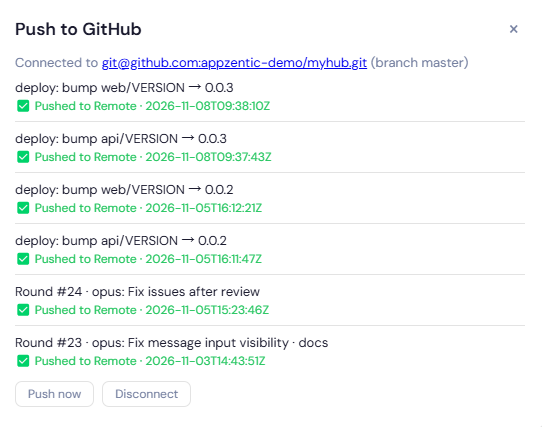
Connect an empty repository once. From then on, every change the AI makes is committed and pushed automatically, each chat round and each deploy, so your repo's history reads like a project log.
- Setup is one SSH key, from My Profile → GitHub, added to your GitHub account
- Signing keys and passwords are never pushed
- Or export the whole project as a
.tar.gz, any time
Prefer to watch?
Up so far: registering an iPhone, Co-vibe, your own server, your own Apple account and connecting GitHub. Videos for the other parts are being edited and will go next to their screenshots. Until then, the quickest way to see it is to try it.